

Affordable macro time-lapse photography
Note: This article was originally posted elsewhere in the first half of 2025, contents may be outdated, but I decided to post it regardless, for my general audience and everyone interested in tech and carnivorous plants. This is a continuation of my other articles New Timelapse Project! and A Washing Machine in Miniature? Digestive Fluid Cycling in Drosera scorpioides.
Introduction
What actually happens when prey is caught? This fundamental question has certainly been asked by all of us at least once at the beginning of our “carnivorous career.” Especially with active traps such as the snap traps of Dionaea and the sticky traps of Drosera and Pinguicula, it is easy to observe the entire impressive process from prey capture to digestion and trap reactivation. The formation of the traps, the growth of the flowers, and the development of the plant are no less interesting. However, since the whole process naturally takes a certain amount of time and you don’t necessarily have the time to stare at a plant for days on end (as beautiful as it is), this is an ideal application for time-lapse macro photography. In this article, I would like to introduce you to a little “craft project” that offers a very inexpensive introduction to the world of macro photography and does not require a smartphone or any kind of commercial software.
Raspberry Pi: The little all-rounder
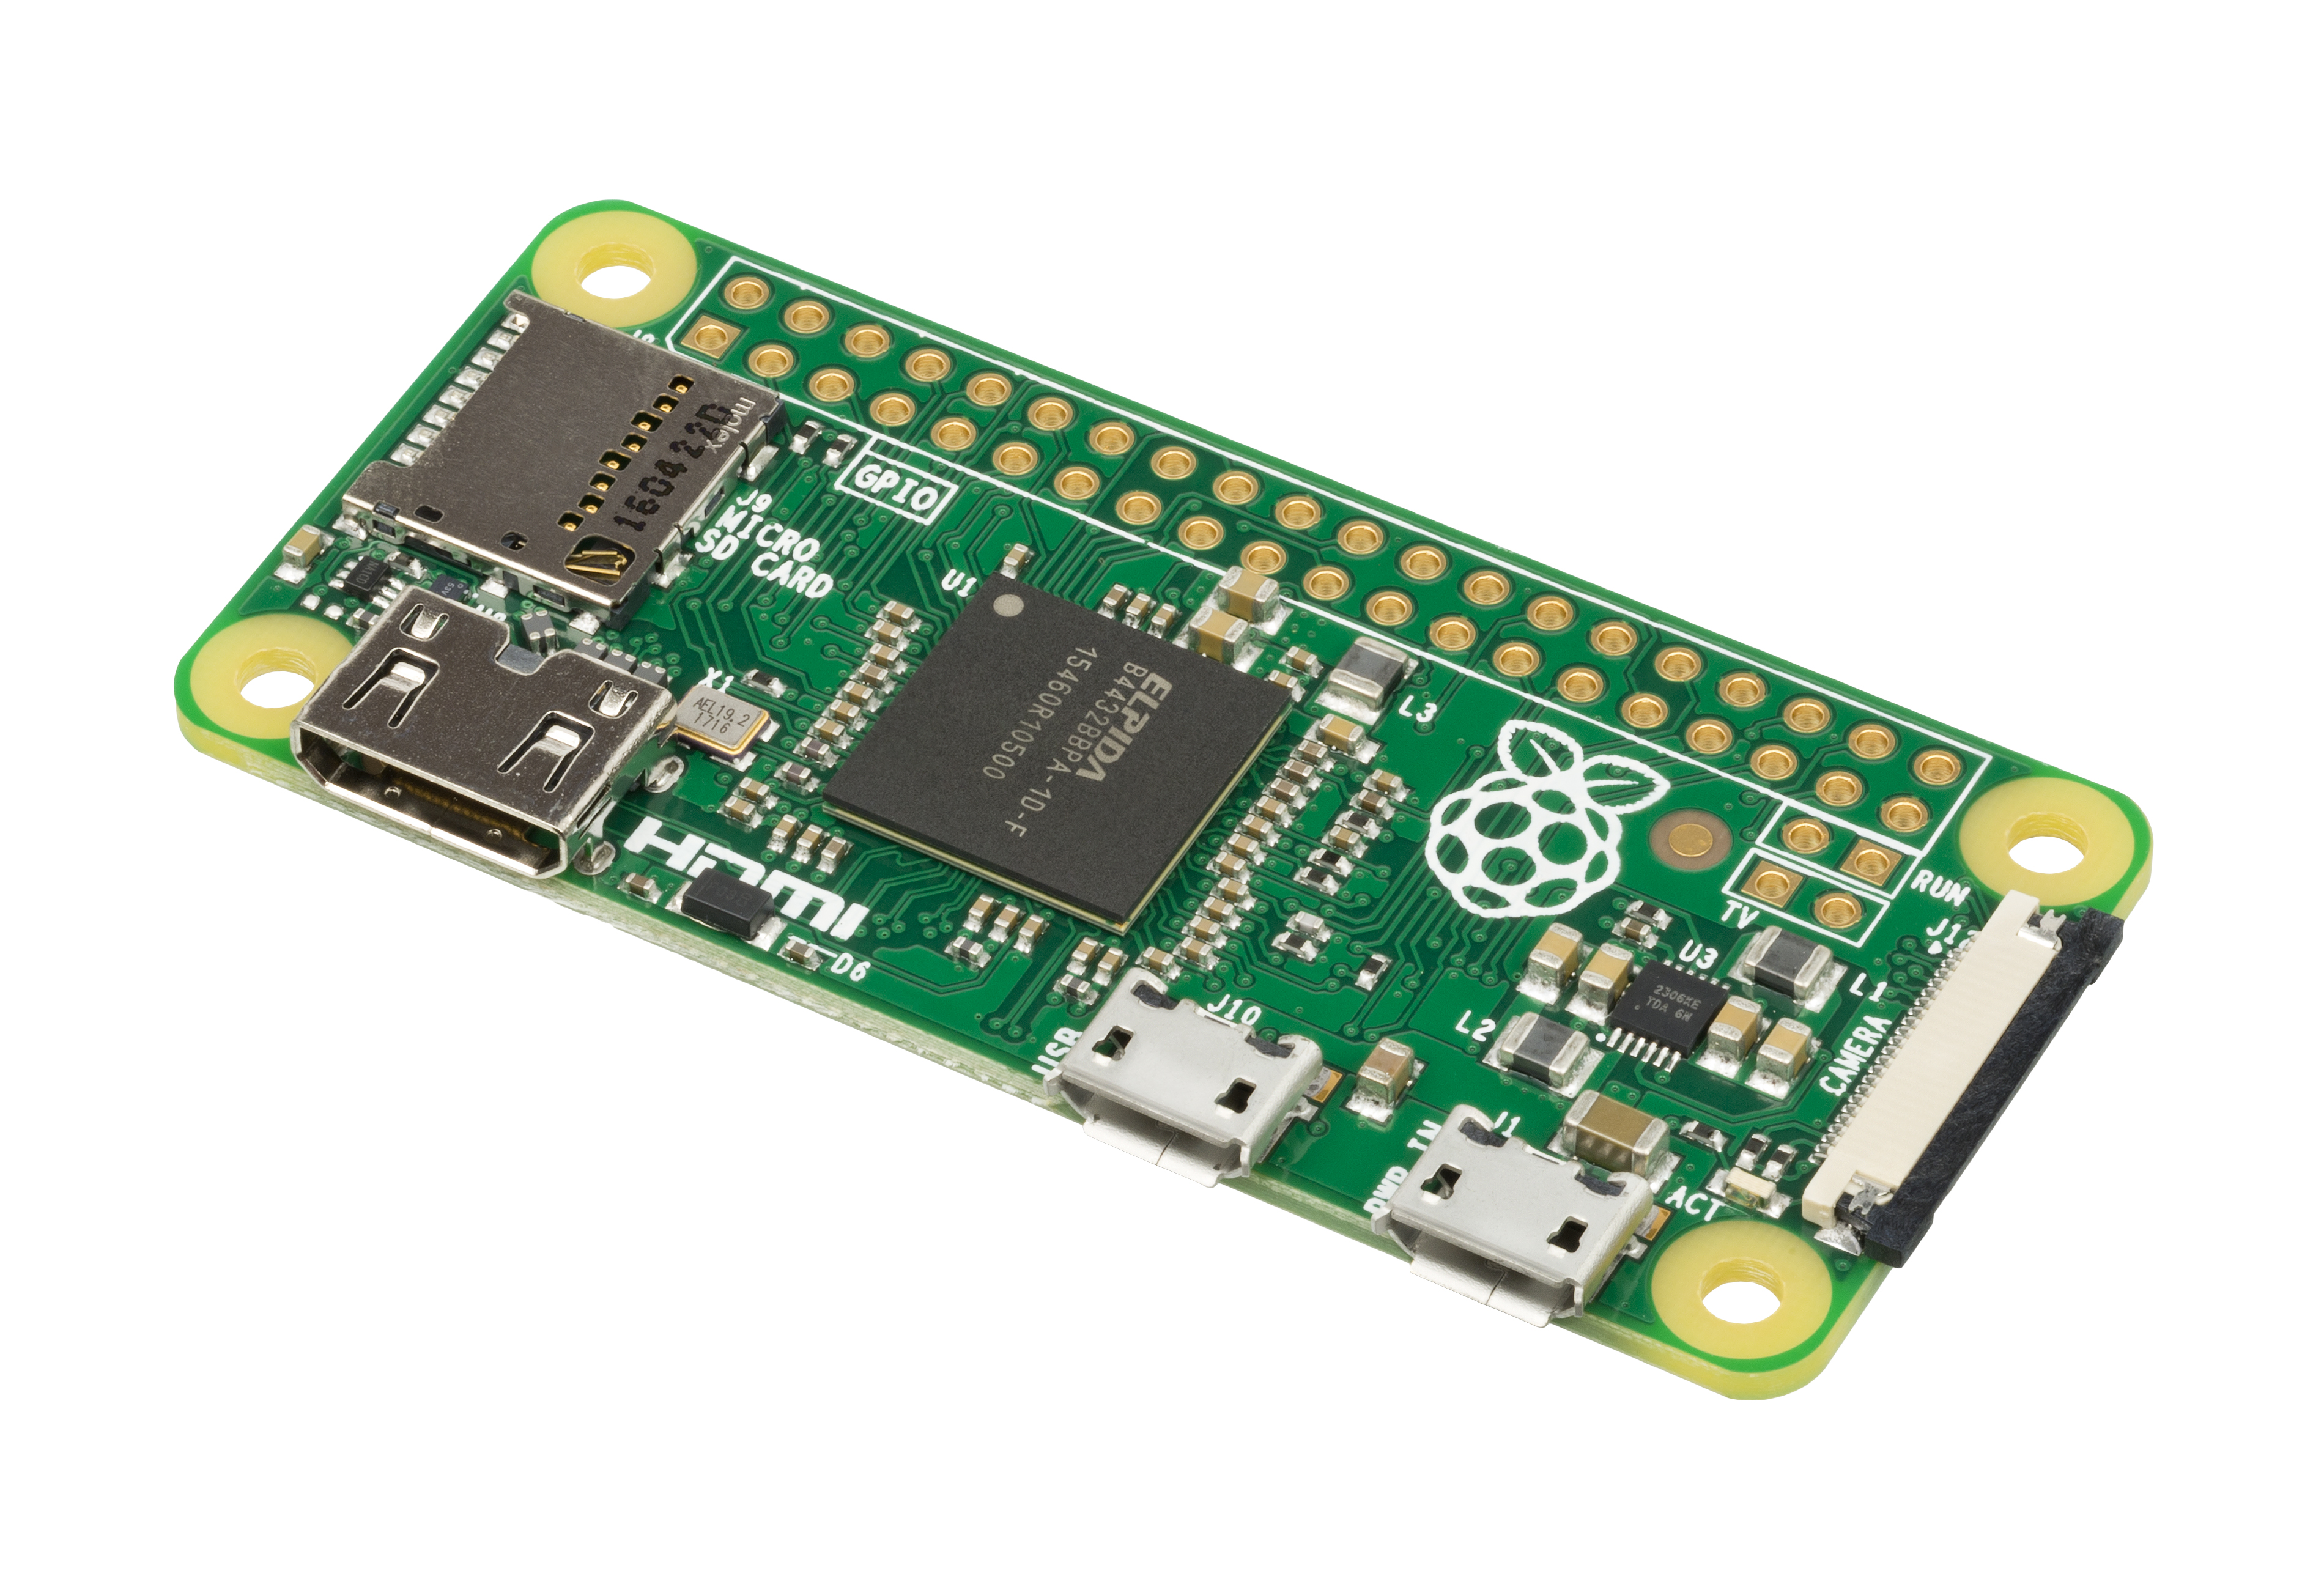
At the heart of the whole story is a Raspberry Pi Zero W – a small single-board computer for less than €20 that, apart from an additional microSD card, has everything you need to run a complete Linux operating system on it, just like on a desktop PC. Of course, this requires a certain willingness, or perhaps even some initial knowledge, to get to grips with Linux. But don’t worry, it doesn’t get too technical in this regard!
The nice thing about the Raspberry Pi is that, in addition to functioning as a “normal” computer, it also has a number of built-in interfaces for interacting with other hardware, be it sensors, LEDs, motors, or even cameras. The advantage of this is that it gives you complete freedom to put everything together according to your own ideas and needs.
There are many cameras available for the Raspberry Pi, especially from the manufacturer of the small computers themselves. Typically, the term “camera module” quickly comes to mind—these are small circuit boards that house a camera sensor with a little additional electronics. These modules are connected to the Raspberry Pi via a cable and are then ready for immediate use. The cameras usually do not have their own image processor, which means that processing takes place entirely in the computer itself and not in the modules. This means that you can do all sorts of things with the software on the computer and set it up according to your preferences. There is software for the command line for this purpose, or, as in my case, you can write your own little script to simplify the whole thing and make it easy to run at regular intervals.
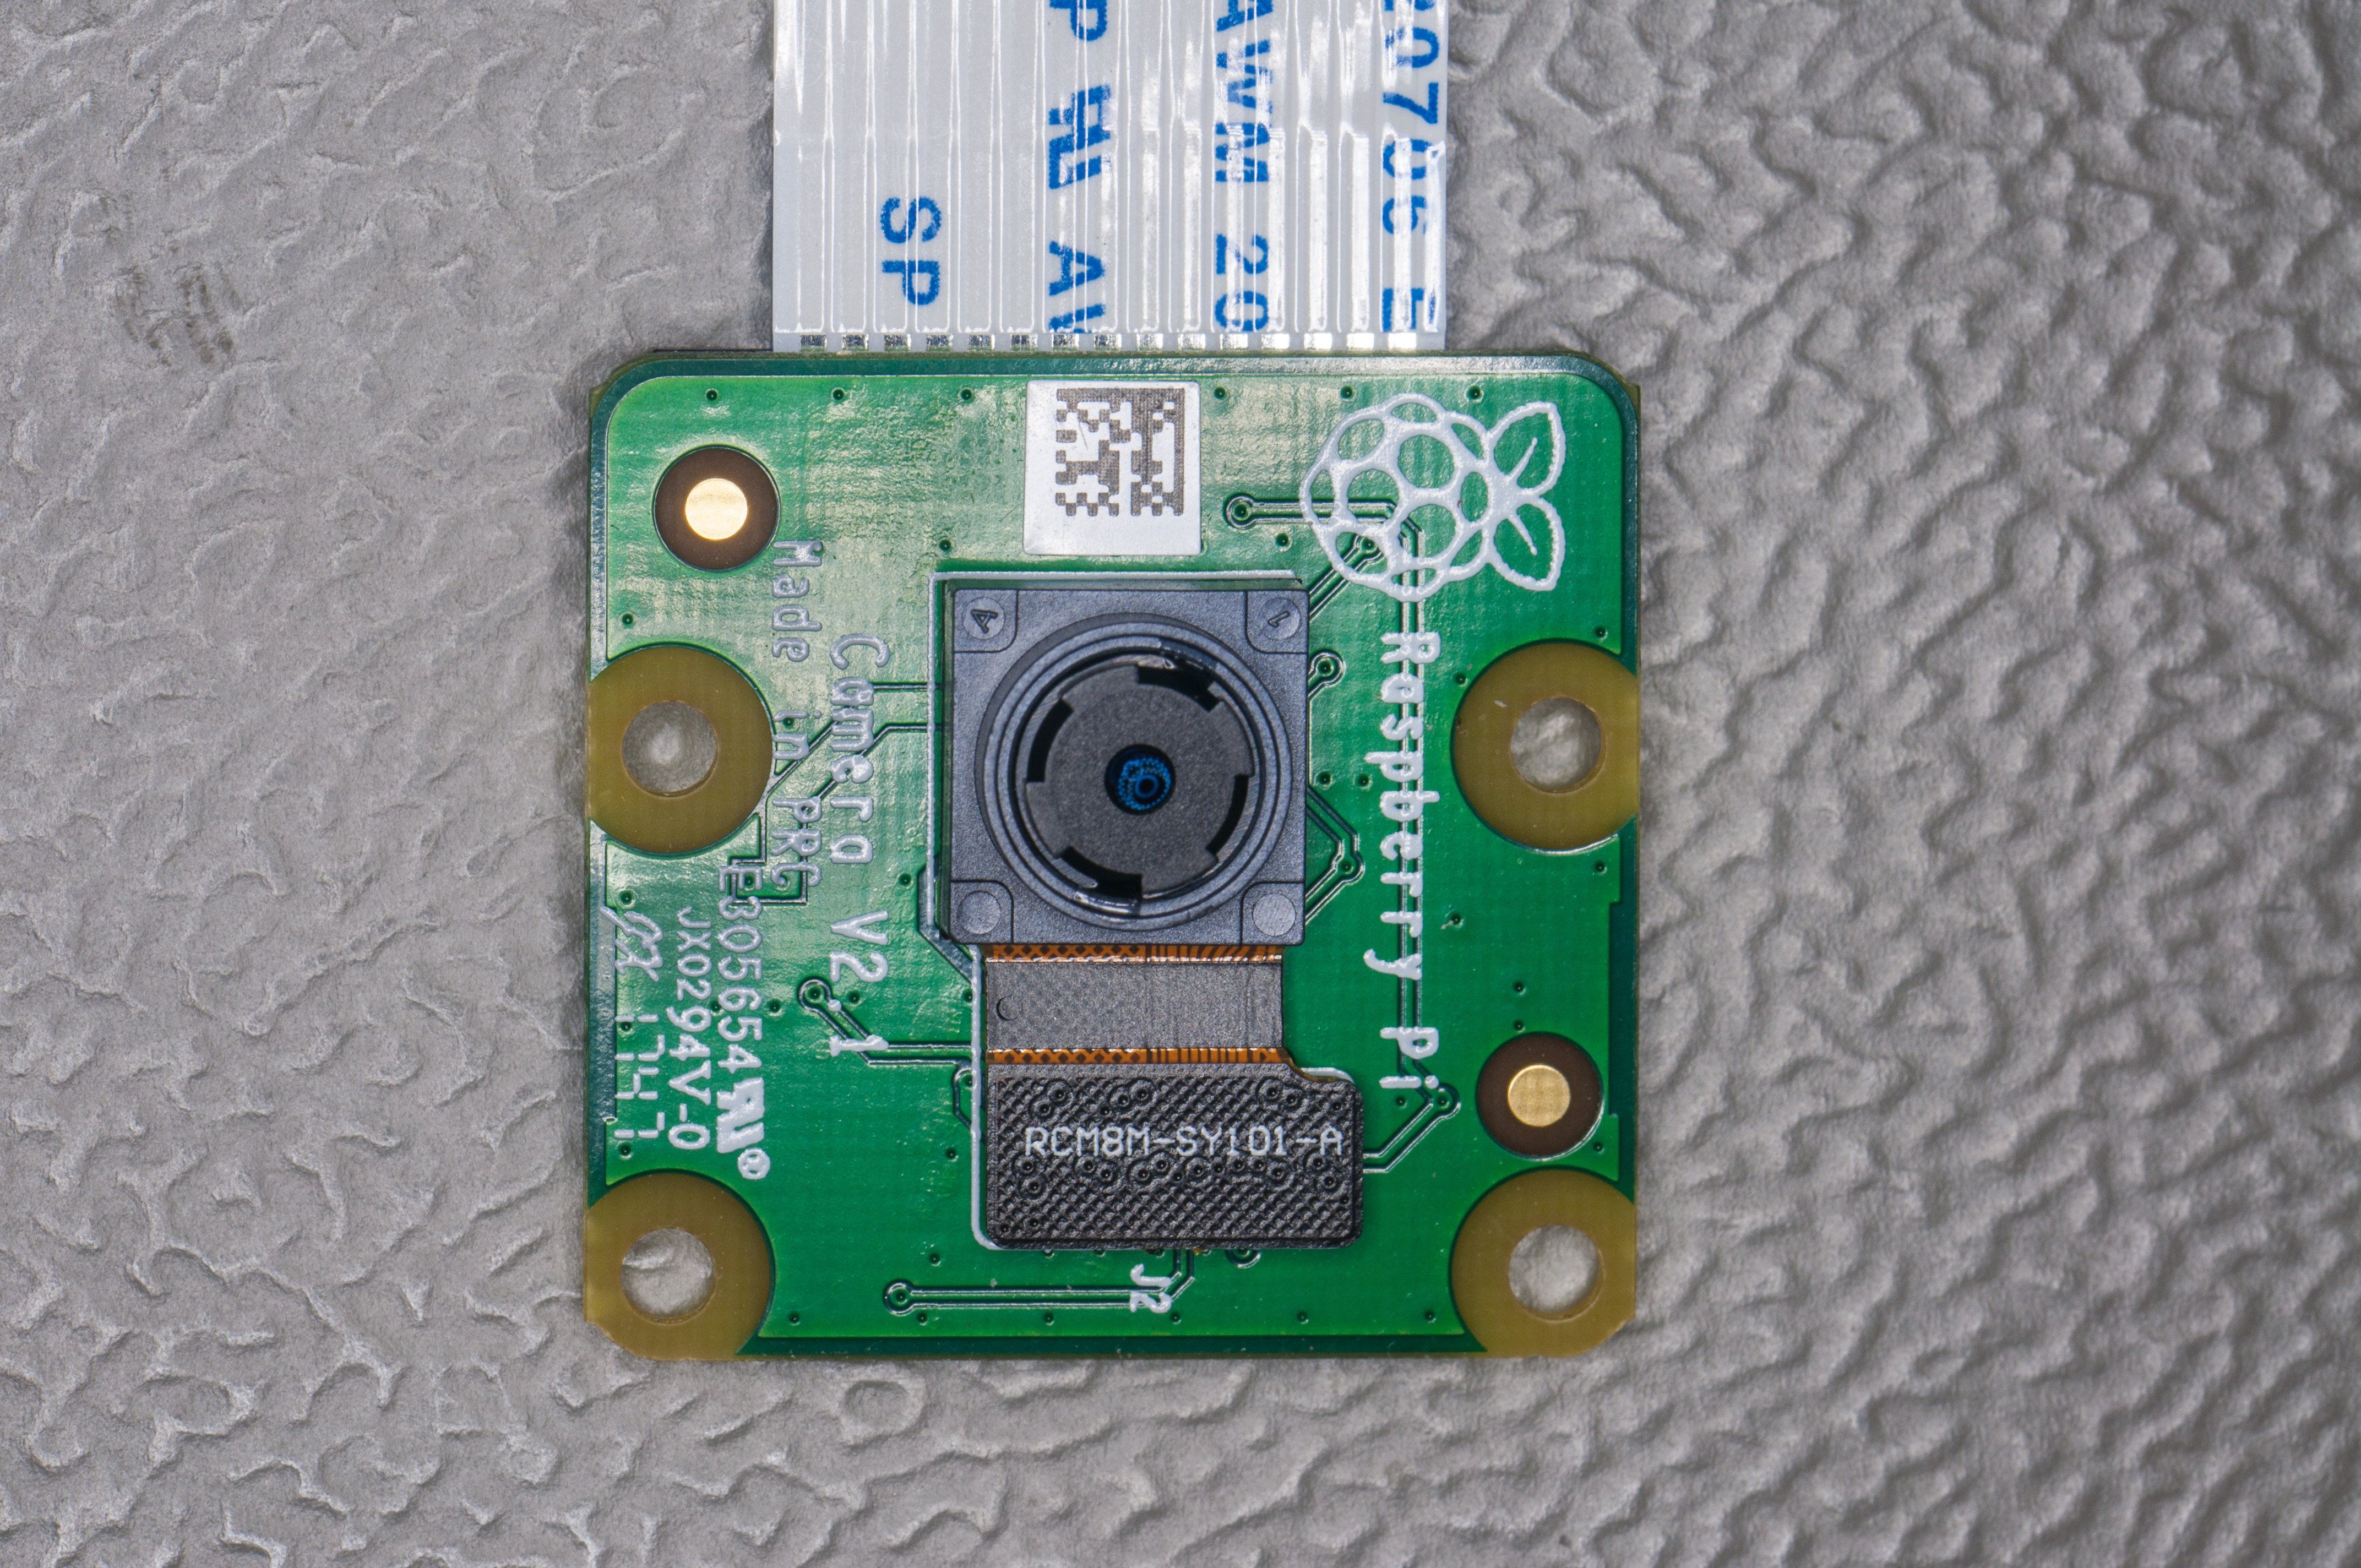
The specific camera module we are referring to here is the “Camera Module V2.” It is now almost 10 years old, so it is easy to get hold of, and unlike the Raspberry Pi modules with limited autofocus or even fixed focus, it has a lens that can be adjusted manually. This allows you to easily focus at a distance of 2–3 cm to capture a reasonable object size. Admittedly, manually adjusting the lens can be annoying, and the image quality is no longer up to date (8 MP, resolution 3280 x 2464 and a Sony IMX219 sensor), but I was all the more amazed at how easy it is to take really nice pictures!
I purchased a flexible gooseneck tripod with a table clamp to hold the camera and used a 3D printer to make a small mini housing for the camera. Everything could then be securely attached to the tripod’s 1/4” thread.
To operate and set up the operating system, you can basically follow any current tutorial online, of which there is no shortage these days. It takes about 15 minutes. The camera is connected to the Raspberry Pi via the ribbon cable, and you’re ready to go.
The finished setup
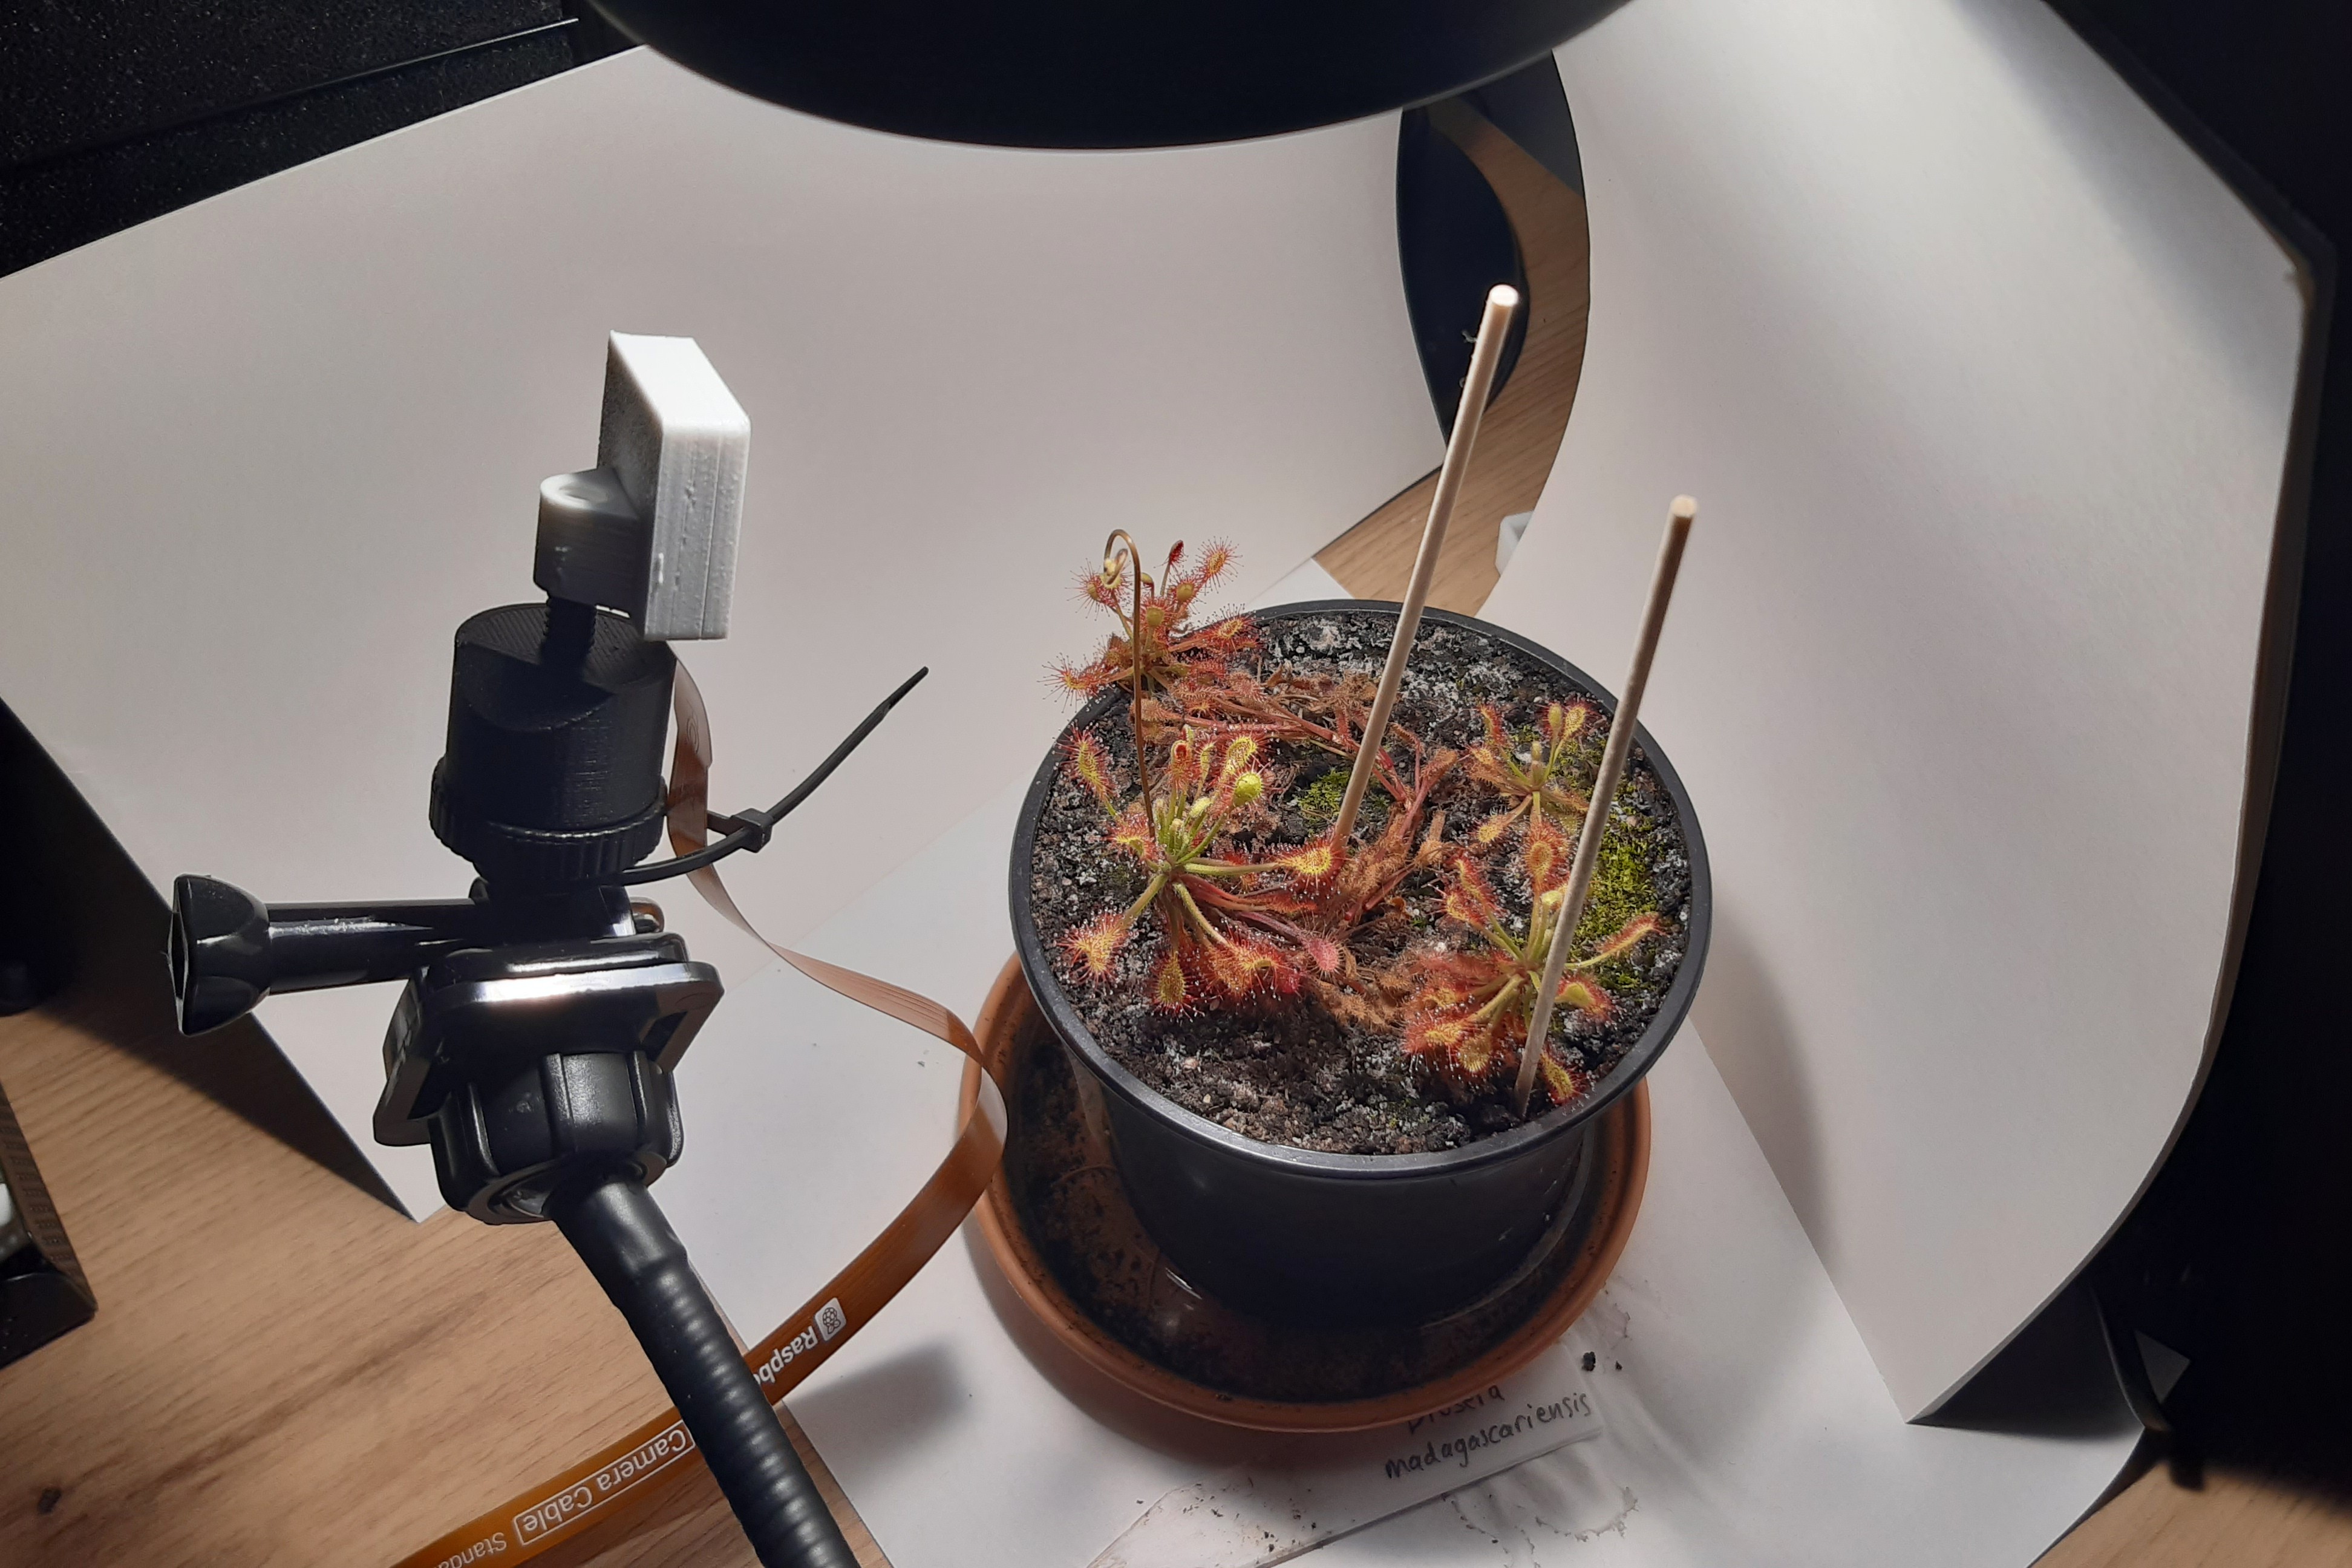
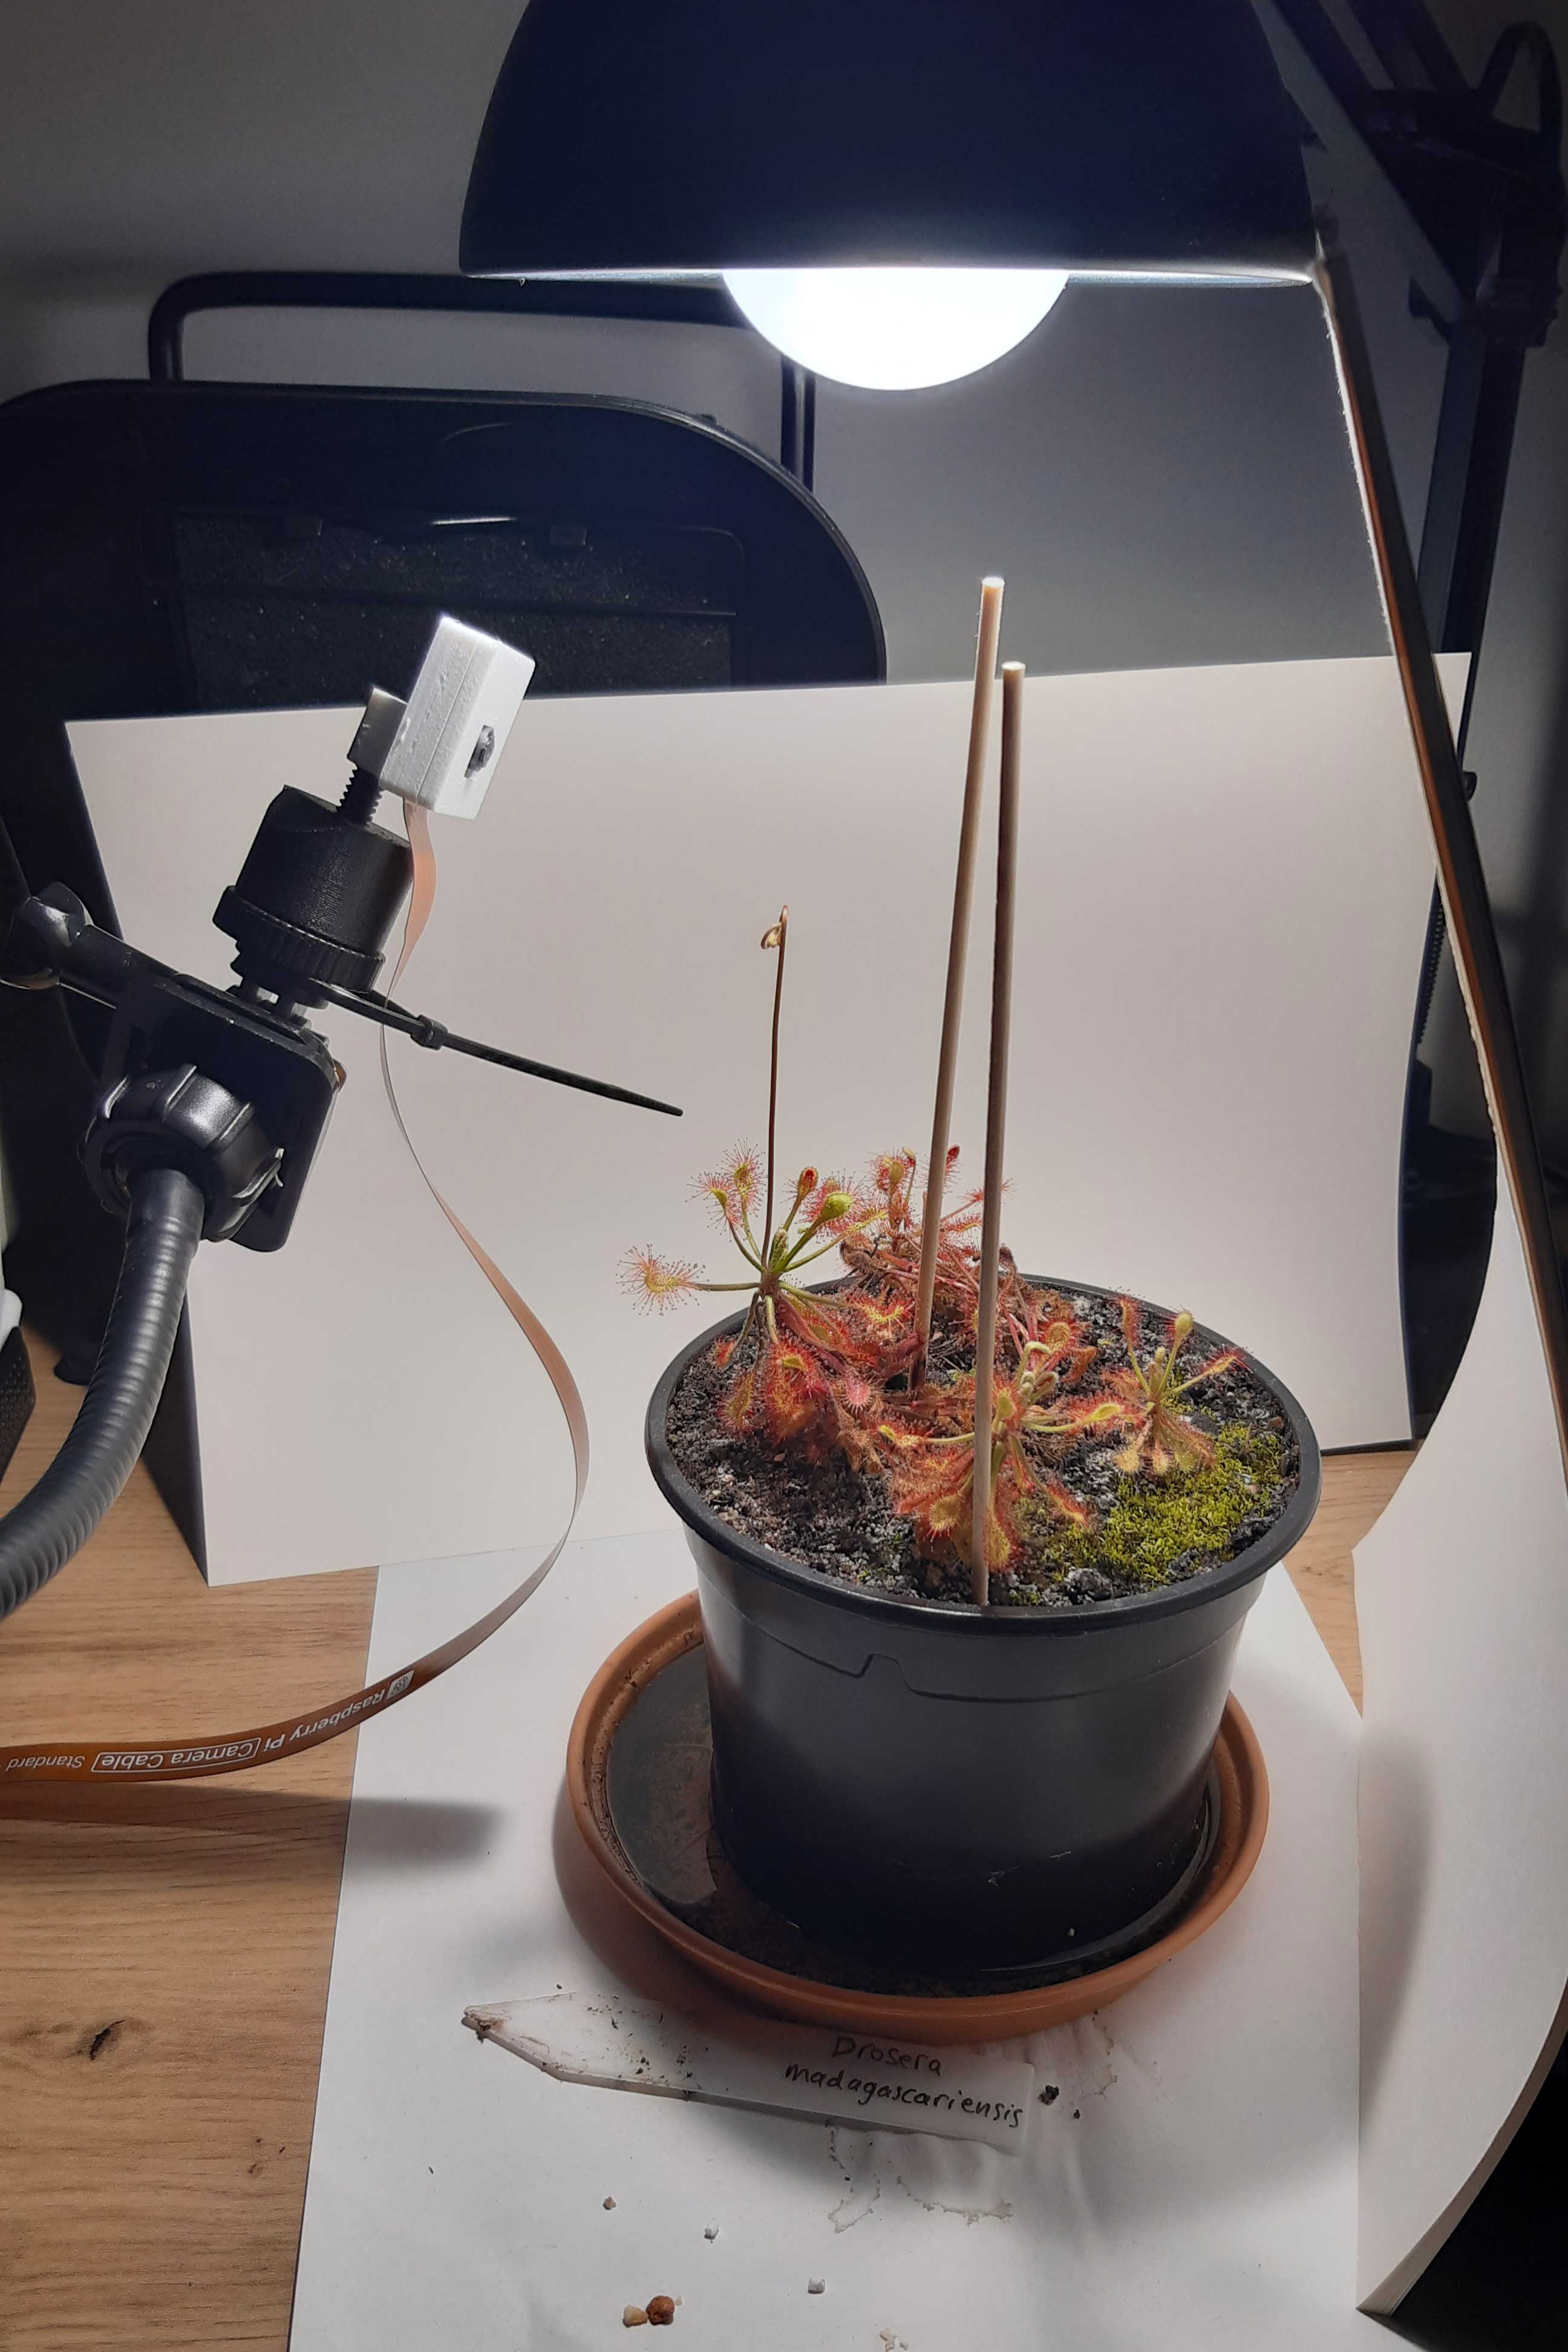
Once everything has been prepared, all you need is good lighting and, by far the most important thing: the plant of your choice. In my case, I used a sundew (Drosera madagascariensis) and the normal LED light from my desk lamp for lighting. The finished setup can be seen in Figures 3 and 4.
Now it was time to start playing around a little: First, I had to determine the appropriate white balance values in the camera software and the exact distance from the object to the camera so that the image was well filled, and then adjust the lens accordingly for focusing. Since I wanted to upload the time-lapse videos to YouTube at the end, I decided on images with a resolution of 2560 x 1440 px (1440p). The camera wouldn’t have been able to handle 4k anyway, but the data volumes are already so large that I would have had to fiddle around with external hard drives.
As mentioned earlier, I wrote a small script that, when executed, takes a single picture with the settings I specified or desired. This script runs every minute, so that I end up with 60 photos per hour. Since I absolutely wanted to have 60 frames per second for the finished videos—for smoother playback—1 second in the finished video translates to exactly 1 hour of video material, and 1 day thus lasts 24 seconds in time-lapse.
I download the images obtained in this way to my PC via the network and automatically merge them into an .mp4 video file using additional software. That easily adds up to 12,000 images for one recording. Fortunately, I have not encountered any technical problems with this type of long-term recording so far, which means that the setup is also very stable.
Results and interesting findings
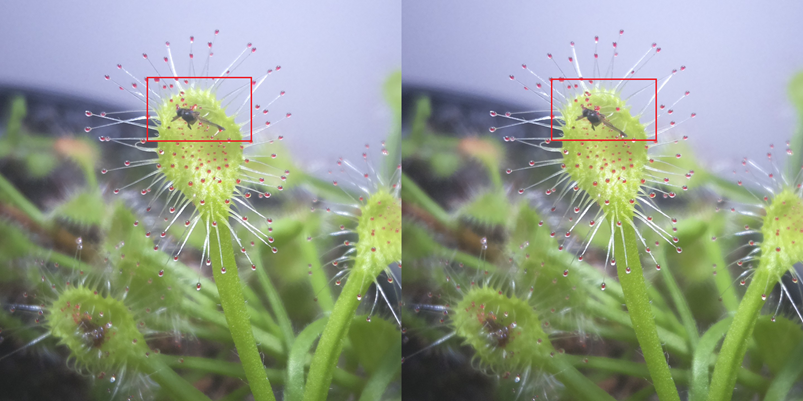
In the nearly two months that the setup has been running (as of March 2025), it has been in almost continuous use, still with the same plant. I wanted to test so many different things and observe the plant’s reactions. It started with a very impressive demonstration (at least for me) of the reaction speed of D. madagascariensis. I had placed a fungus gnat on one of the plant’s sticky leaves and lo and behold, within less than a minute, the first tentacle seemed to have moved entirely toward the insect, with a few more following close behind (see Figure 5)! I knew that the plants react quickly, but not that quickly. Accordingly, the photo interval of one minute was even too long, at least in the initial phase.
The digestive juices secreted by the plant and soaking the insect were also clearly visible. After about three to four days, this process seemed to end. Most of the tentacles had moved away from their prey, leaving only the dry, indigestible remains behind.
Something else I quickly learned during the first shoot was how incredibly fast this particular plant grows. I had to change the camera position several times because other trap leaves had grown in front of it or the object in focus had moved too far away. Within less than a week, completely “fresh” trap leaves were already hunting for prey here. For the next shots, I finally paid more attention to having a “clear path” and finding an angle that was less prone to interference.
Incidentally, the plant also reacted to experiments with indigestible pieces of perlite, not much slower than usual (in terms of reaction time), but with significantly fewer moving tentacles. In both cases where I tried this, however, at least one tentacle moved completely toward the source of this purely mechanical stimulus, “looked” at the object, and then quickly returned to its starting position.
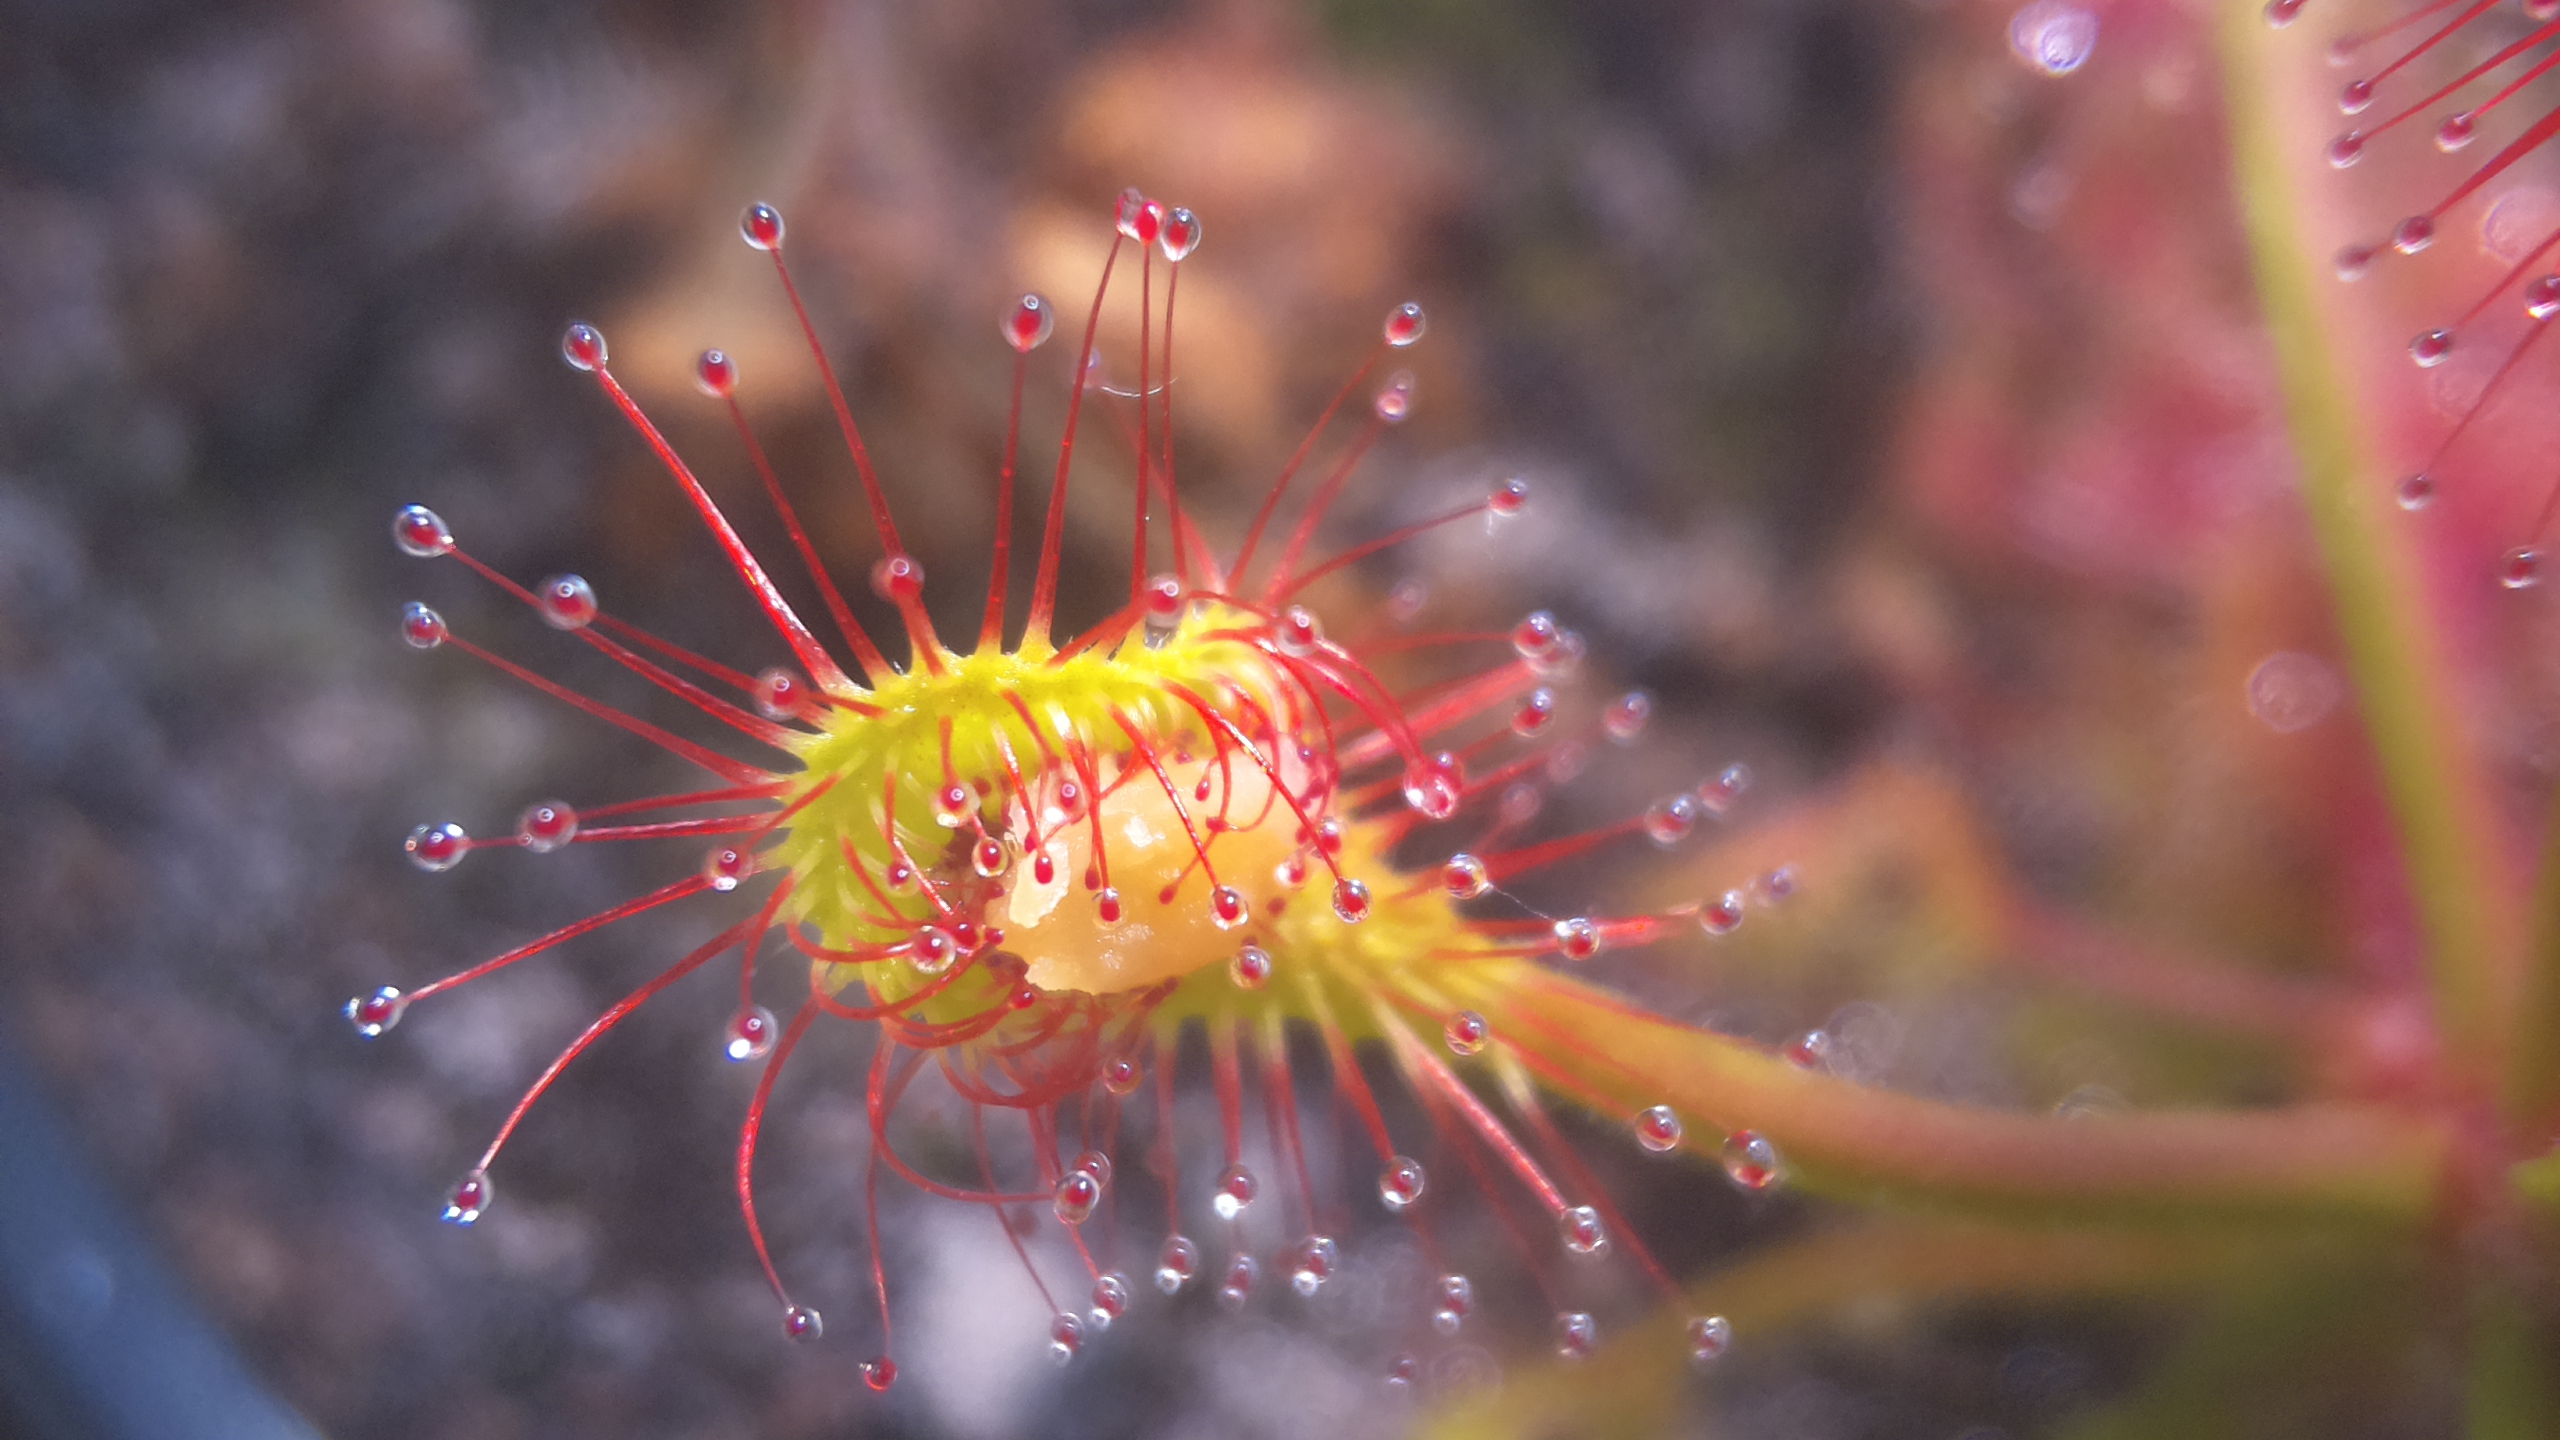
Incidentally, this sundew also seems to like peanuts, unsalted of course. In a time-lapse video, you could actually see how a small piece swelled up after being enclosed by many tentacles, and the leaf began to wrap itself around it. A snapshot of this process can be seen in Figure 7.
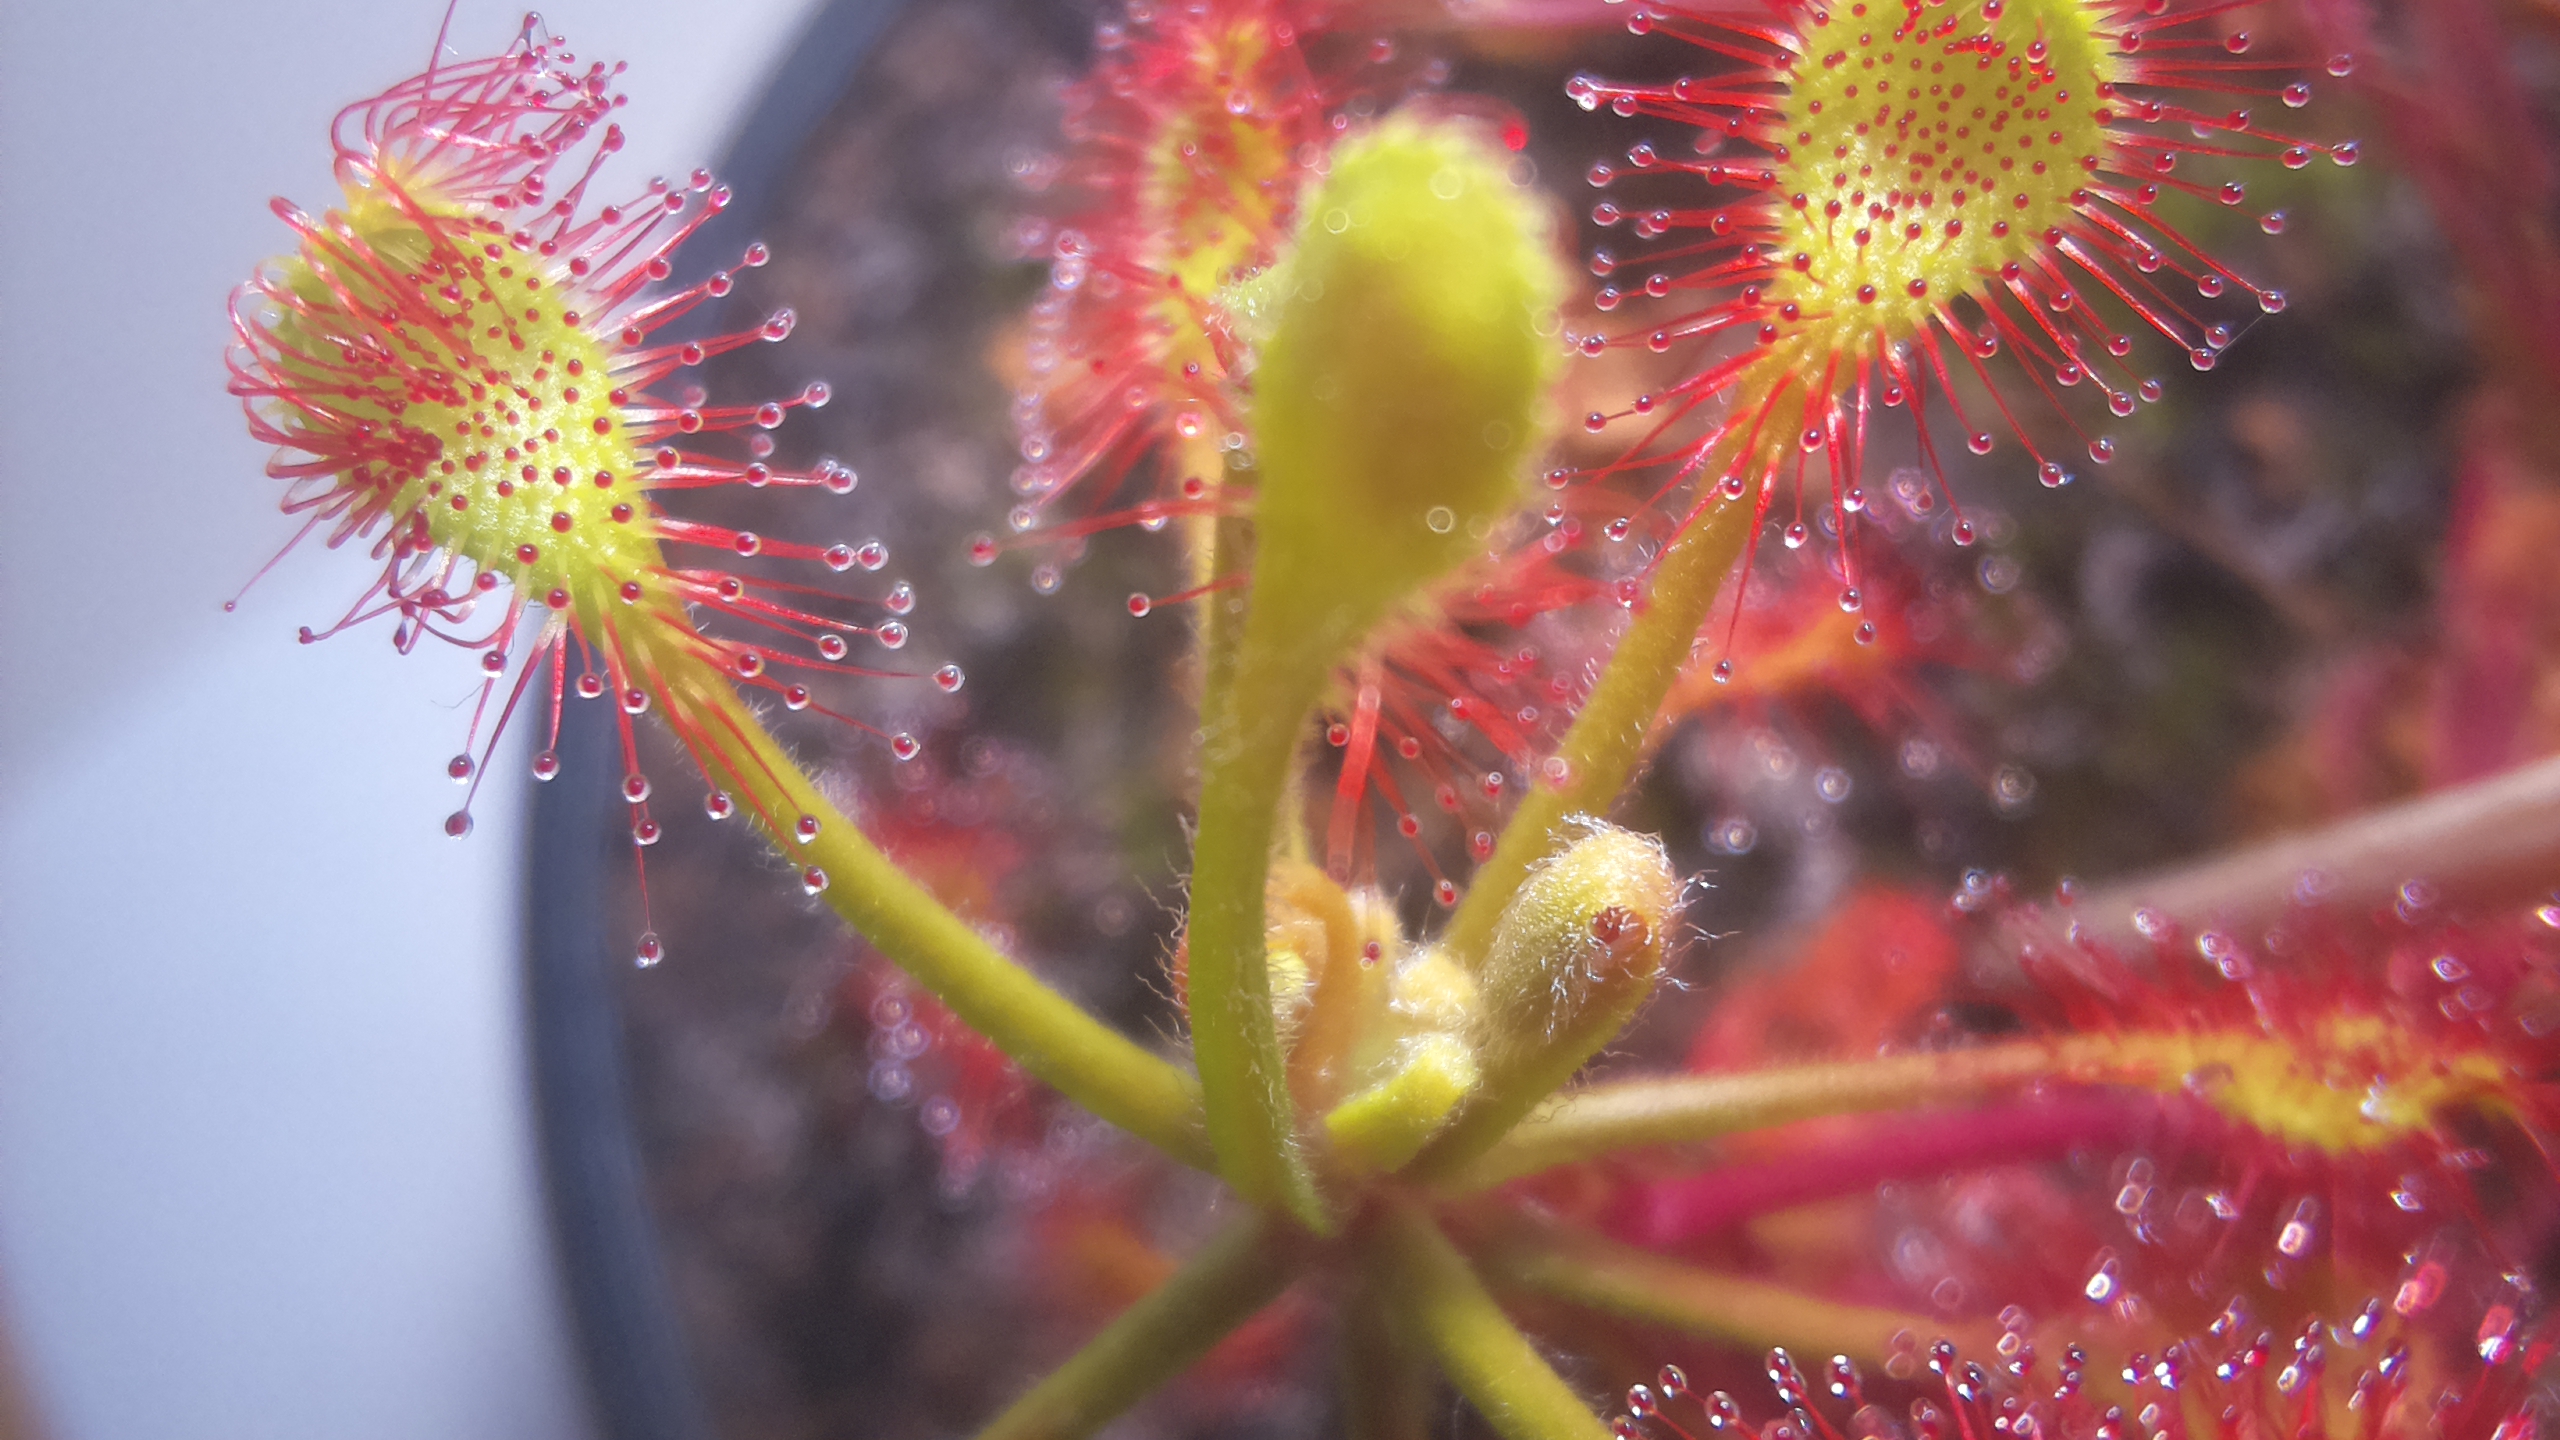
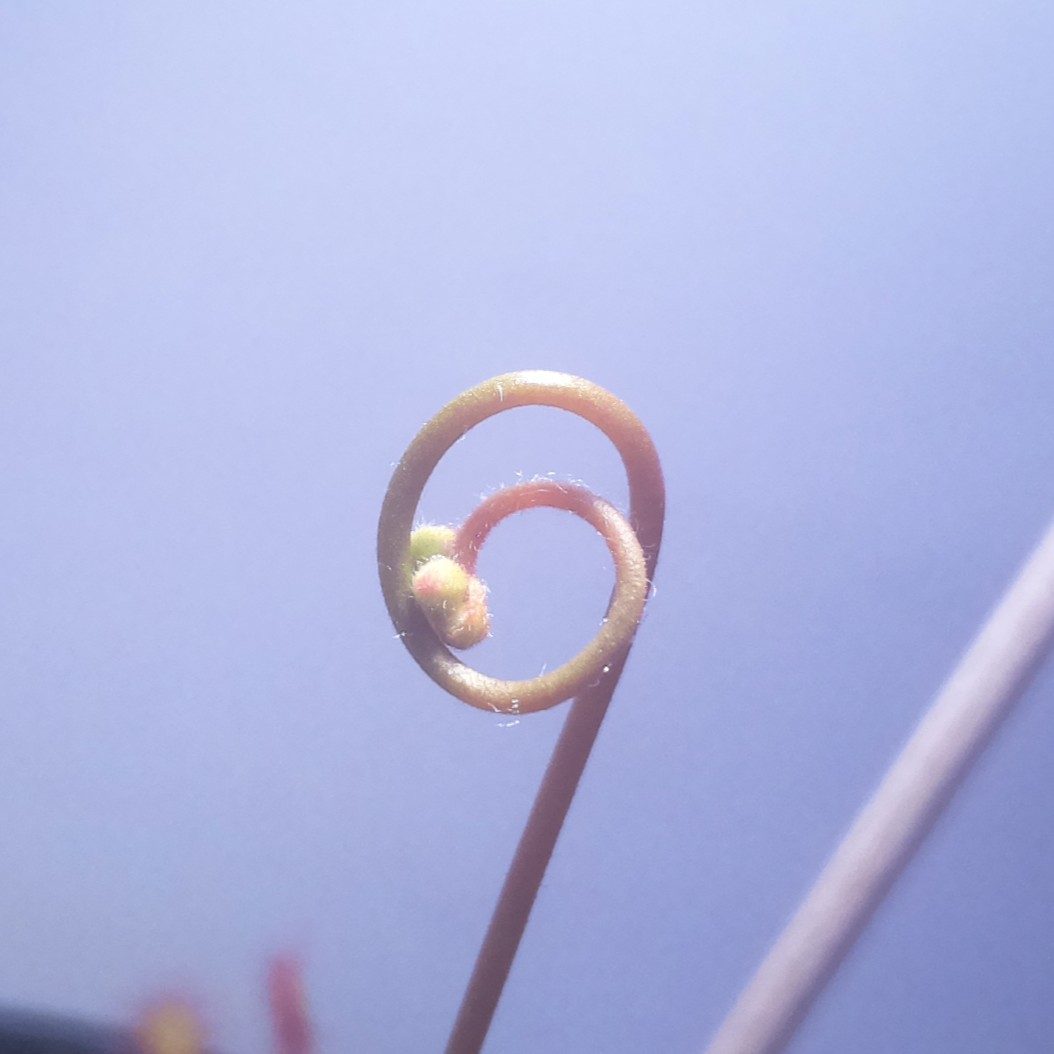
Incidentally, it is also interesting to observe the growth of the plants in general; from the growth of a trap leaf with the unfolding of the tentacles to the ever-higher inflorescence – the upper part of which, together with the flowers, remains more or less the same until the end and grows upwards from below.
Conclusion and future
The costs of this setup were very manageable: all in all, it came to less than €50. Since I already had an unused Raspberry Pi Zero with a microSD card lying around, the project only cost me around €20. The initial setup of the software was quite quick and does not need to be changed after the first time. In this respect, I was really amazed at how easy it is to take really interesting pictures of these beautiful plants, and I can only warmly recommend that each of you take a look at them on the website.
One thing I will definitely improve in the future is the camera or camera module itself. On the one hand, higher image quality is always better, of course, and on the other hand, autofocus is obviously much more convenient. I will consider the exact implementation when the budget is available and a suitable solution can be found. It is important that the camera can still focus at a distance of only a few centimeters.
Most of my planned shots of the Drosera madagascariensis shown here are now complete, which means I will also turn my attention to other plants, such as D. rotundifolia, D. adelae, D. scorpioides, and P. vallisneriifolia. I will endeavor to always publish the most interesting observations and photos. By the time you read this, I will probably have taken quite a few new photos.
Please feel free to let me know what you think of this project, what you think could be improved, or what else would be interesting to observe!
Links
Click here to go to the complete YouTube playlist!
Here are the links to videos of most of the recordings mentioned in the text:
- The very first time-lapse:
- The second time-lapse of higher quality:
- Recording with the peanut piece:
- Recording of the plant’s growth with a focus on the inflorescence:
Please discuss below! For my german-speaking audience, there is also a post on the german carnivorous plants forums!
Comments